Have you ever looked at a piece of metal and wondered what’s happening inside? How do engineers know a weld is sound, or why a stainless steel pipe failed? They don’t use X-ray vision; they use acids.
Metal etching is the bridge between a shiny, polished surface and the hidden world of grains, phases, and heat-affected zones. Today, we are going deep into the chemistry of metallography. We’ll cover etchants for weld macros, and specific recipes for everything from Carbon Steel to Nickel Alloys and Aluminum.
What is Acid Metal Etching Process?
Metal etching is a technique used to create intricate designs on metal surfaces. Etching involves the use of chemical or electrochemical methods to create intricate designs and patterns on metal surfaces that can be seen with the naked eye.
Etching is a controlled corrosion process. After polishing a metal sample to a mirror finish, you apply a specific chemical (the etchant).

Because metals are polycrystalline (made of many tiny crystals called grains), different areas corrode at different rates:
- Grain Boundaries: Corrode faster, creating tiny valleys.
- Different Phases: If you have ferrite and pearlite, one will be attacked more than the other.
- Chemical Composition Variations: Welds have different chemistry than base metals, causing them to etch differently.
When light hits the etched surface, it scatters off these valleys and chemically altered areas, revealing the structure under a microscope. 🔬 The metal etching process starts with the preparation of the surface by cleaning it thoroughly.
The process is followed by applying an acid-resistant material called a “resist” to the metal surface. The resist acts as a barrier between the areas that will be etched away and those that will stay untouched.
Once set up, an etchant such as hydrofluoric acid is applied to corrode away at exposed portions of the metal, producing either shallow lines or deeper grooves depending on how thickly it’s applied.
🛑 SAFETY FIRST: The Metallographer’s Mantra 🛑
Before we list a single recipe, we must talk about safety. We are dealing with concentrated acids, strong bases, and toxic chemicals. This is not a joke.
- PPE is Mandatory: Safety glasses (or face shield), acid-resistant gloves (Nitrile usually works, but check chemical compatibility), and a lab apron. 🥽🧤🧥
- Fume Hood Only: Never etch outside a working fume hood. Some reaction byproducts are toxic or explosive (looking at you, Hydrogen gas 💥).
- The AAA Rule: Always Add Acid to water/solvent. Never add water to acid, or it will react violently and splash back at you. 💧➕🧪 = ✅ / 🧪➕💧 = ❌
- Storage: Store acids separately from bases and flammables.
- Disposal: Neutralize and dispose of used etchants according to local hazardous waste regulations. 🚮
Acids for Metal Etching
Etching metal can provide a unique and stylish look to any piece of jewelry or decoration. Many people use acids to etch their metals as they are readily available and relatively safe to handle if safety precautions are followed.
However, there are a variety of different types of acids that can be used for etching different metals. Knowing which one should be used is key in achieving the desired effect.
Note: Follow all safety guidelines & use the PPE’S.
Below are the main acids for metal etching you can try:
- ✨ Nitric acid -HNO3✨: Can be used on most of metals. Dilute with water in the ratio of 1:1 or 1:3. Can also be mixed with acetic acid in 1:1.
- ✨ Copper sulfate ✨: Good for carbon steel or other metal ferrous metals.
- ✨Sulfuric acid-H2SO4✨: Can be used with most of metal. dilute with water before use.
- ✨Ferric chloride-FeCl3 ✨: Use for copper, copper alloys, brass, stainless steel & Nickel alloys.
Acids for metal etching have been around for centuries and are still widely used today. They are a vital part of many manufacturing processes, from circuit boards to jewelry making. Acids help create intricate patterns on metal surfaces that would otherwise be impossible to obtain with traditional tools.
The most common acid used for etching is hydrochloric acid, which is often combined with other acids like nitric and sulfuric acid in order to create a more powerful solution.
This combination is referred to as aqua regia and can be used on both ferrous and non-ferrous metals such as aluminum, brass, bronze, iron, steel and titanium.
The mixture creates an exothermic reaction which helps soften the metal surface before the etching process begins. The result is a detailed design or pattern etched onto the metal surface at a microscopic level without causing any damage or corrosion.
Etchants for Weld Macro Analysis
Weld macro-etching is performed at low magnification (usually <10x or even with the naked eye). The goal is to see the weld bead shape, penetration depth, fusion zones, and the Heat-Affected Zone (HAZ). Here is how you prepare that cross-section.
The Weld Macro “Big Three”
| Metal Type | Etchant Name | Composition / Recipe | Application Notes 📝 |
| Carbon & Low-Alloy Steels | Fry’s Reagent | 90g CuCl_2 + 120ml HCl + 100ml H_2O | Excellent for showing strain lines and flow lines in steel welds. |
| Stainless Steels (All Grades) | Adler’s Reagent | 3g CuCl_2 (ammonium cupric chloride) + 15g FeCl_3 + 75ml HCl + 30ml H_2O | The gold standard for SS welds. Highlights the HAZ beautifully against the base metal. 🌟 |
| Cr-Mo Steels (P11, P22, P91) | Acidified FeCl_3 | 25g FeCl_3 + 25ml HCl + 100ml H_2O | Good for differentiating between the weld metal and parent metal in these high-temperature alloys. |
How to Macro Etch a Weld 👨🏭
- Cut & Grind: Section the weld and grind smoothly (usually up to 320 or 600 grit—polishing isn’t usually necessary for macro).
- Clean: Remove all grease and fingerprints. 🧼
- Apply: Swab the etchant onto the surface using a cotton ball for 10–30 seconds.
- Observe: Watch the structure appear! 🤩
- Stop: Rinse immediately with water, then alcohol, and dry rapidly with hot air.
🔬Etchants for Micro Analysis (The Deep Dive)
Here, we need a mirror-polished sample (usually down to 1-micron or 0.05-micron alumina/diamond). We are looking at grain size, inclusions, and phase identification under the microscope.
Here are the specific recipes grouped by metal type.
Carbon, Cr-Mo, and Low-Alloy Steels Etchants
| Etchant Name | Composition / Recipe | Purpose / What it Reveals 🧐 |
| Nital (1% – 5%) | 1–5ml HNO_3 (Nitric Acid) + 95–99ml Ethanol/Methanol | The most common etchant for ferritic steels. Reveals grain boundaries, pearlite, and martensite. Warning: >5% Nital is explosive! 💥 |
| Picral | 4g Picric Acid + 100ml Ethanol | Better than Nital for revealing pearlite and carbides. Does not etch Ferrite grain boundaries. |
| Vilella’s Reagent | 5ml HCl + 1g Picric Acid + 100ml Ethanol | Great for martensitic or highly tempered structures (common in Cr-Mo steels like P91). Also used for some duplex stainless steels. |
Stainless Steels (Austenitic, Ferritic, Duplex) Etchants
Stainless steel resists corrosion, so we need angry, strong acids to etch it.
| Etchant Name | Composition / Recipe | Metal Sub-type | Application Notes |
| Kalling’s No. 2 | 5g CuCl_2 + 100ml HCl + 100ml Ethanol | Austenitic (304, 316) & Duplex (2205) | Excellent for revealing general microstructure and differentiating phases in duplex. Darkens ferrite. |
| Mixed Acids (V2A-Beize) | 100ml HCl + 10ml HNO_3 + 100ml H_2O | Austenitic, High-Nickel | Often used by swabbing. Reveals grains and Twins. |
| Electrolytic Oxalic Acid | 10g Oxalic Acid + 100ml H_2O | Austenitic, Ferritic | Requires DC current (usually 1–6V). Great for grain boundary reveals and susceptibility to intergranular corrosion testing (ASTM A262). ⚡️ |
Copper, Brass, and Bronze Etchants
These are soft metals that stain easily. Etching is usually done by immersion.
| Etchant Name | Composition / Recipe | Application Notes 📝 |
| Acidified FeCl_3 | 5g FeCl_2 + 10ml HCl + 100ml H_2O | Common etchant for Brass and Bronze. Reveals grain structure well. |
| Ammonium Persulfate | 10g Ammonium Persulfate + 90ml H_2O | Good for pure Copper. Brightens the surface and reveals grains. |
| Hydrogen Peroxide / Ammonia | 1 part H_2O_2 + 1 part NH_4OH | Gives a good grain relief etch on copper and many alloys. Mix fresh, do not store! |
Cast Iron (Gray, Ductile, Malleable) Etchants
The primary goal is usually phase identification (Graphite flakes/nodules within a matrix of Ferrite, Pearlite, Martensite, or Steadite).
| Etchant Name | Composition / Recipe | Application Notes |
| Nital (2%) | 2ml HNO_3 + 98ml Ethanol | General purpose matrix reveal (Ferrite vs Pearlite). |
| Stead’s Reagent | 10g MgCl_2 + 40g CuCl_2 + 20ml HCl + 1000ml Ethanol (w/ small water) | Excellent for coloring the matrix to highlight Steadite (the brittle iron-phosphorus eutectic). |
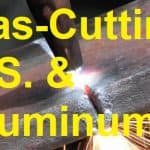
Aluminum and Alloys Etchants
Aluminum forms a tenacious oxide layer. We need etchants that can attack this layer and reveal the grains without causing pitting.
| Etchant Name | Composition / Recipe | Application Notes 📝 |
| Keller’s Reagent | 2.5ml HNO_3 + 1.5ml HCl + 1ml HF + 95ml H_2O | The classic etchant for aluminum alloys (2xxx, 6xxx, 7xxx). Reveals structure of the grains and HAZ in welds. Contains HF – Extremely Dangerous! 🔥☠️ |
| Graff-Sargent | 15.5ml HNO_3 + 0.5ml HF + 84ml H_2O | Good grain boundary etchant for pure aluminum and soft alloys. |
| Flick’s Reagent | 15ml HCl + 10ml HF + 90ml H_2O | Common macro etchant for aluminum welds. Use by swabbing. |
Nickel Alloys (Inconel, Monel, Hastelloy) Etchants
These superalloys are designed to resist corrosion at high temperatures. They require severe chemical attack to etch.
| Etchant Name | Composition / Recipe | Application Notes |
| Glyceregia | 10ml Glycerol + 15ml HCl + 5ml HNO_3 | Good general etchant for many Ni-based superalloys. Mix fresh, cannot be stored. |
| Mixed Acids (Water regia variant) | 10ml HNO_3 + 20ml HCl + 20ml Glycerol + 10ml H_2O_2 | For very corrosion-resistant alloys like Hastelloy C. |
| Electrolytic Oxalic or H_3PO_4 | Varies | Often used for Inconel grain boundary reveals. ⚡️ |
Tips for a Perfect Etch
- Preparation is Everything: If your sample has scratches from polishing, etching will exaggerate them. Make sure you have a true mirror finish first. 🪞
- Degree and Repeat: If you don’t etch long enough, you won’t see anything. If you etch too long, everything gets dark and ugly (over-etched). It’s better to under-etch, look under the microscope, and then re-etch for a few more seconds if needed.
- Use Fresh Etchants: While Nital can keep for a short while, many mixed etchants (like Keller’s or Glyceregia) degrade quickly. Mix them right before you need them.
- Agitation is Key: For immersion etching, move the sample gently in the acid to ensure fresh chemical reaches the surface and bubbles (which can mask the surface) are swept away.
- Stop Means Stop: Rinse thoroughly with water to stop the chemical reaction, then rinse with ethanol (which displaces the water) and dry instantly with a hair dryer or compressed air to prevent staining or corrosion from the water. 🌬️
The Chemical Arsenal Summary (Periodic Table of Pain)
- HNO_3 (Nitric Acid): Oxidizer. Base for Nital.
- HCl (Hydrochloric Acid): Attacks oxides, used for Stainless, Copper, Nickel. Base for Aqua Regia.
- HF (Hydrofluoric Acid): The most dangerous. Specifically needed to attack Aluminum and Titanium. Requires Calcium Gluconate gel nearby just in case of contact. 🩸☠️
- Picric Acid: A powder that is safe when wet, but explosive when dry. Used for darkening pearlite. 💣
- CuCl_2/FeCl_3: Metallic salts used to increase corrosion rate and provide coloration/contrast.
Steps of Acid Etching on Metals
If you’re looking to acid etch metals for your project, it’s important to understand the steps involved in the process.
The first step is preparing your materials. This includes cleaning the metal with an appropriate solvent so that dirt, oils and other impurities don’t interfere with the etching process.
Once clean, apply an adhesive masking material onto parts of the metal you don’t want etched away; this will protect them from being affected by the acids during later stages.
Detailed steps for Acid etching on metals are :
- Choose the metal for etching and accordingly choose the acid for etching.
- Preclean the surface. Make sure it is free from rust, dust, oil, paint, grease or any other surface contamination.
- Apply the resist layer on area that is not to be etched. Cover the edges, corner or other intrinsic areas.
- Create your design on the metal.
- Apply the etching acid. Make sure to use the PPE and use a well-ventilated area.
- Apply timer. Generally, 10 minutes are sufficient for most surface deep etching.
- Clean the surface with water and dry throughly.
- Remove the resist layer.
Material Welding is run by highly experienced welding engineers, welding trainers & ASNT NDT Level III bloggers.
We strive to provide most accurate and practical knowledge in welding, metallurgy, NDT and Engineering domains.