What is Penetrant Testing or DPT Test?
Liquid penetrant testing (LPT) or also known as the Dye penetrant test (DP Test) is a surface NDT method used worldwide for various type of inspections for raw material, process jobs and welded parts.
Penetrant testing is economical, quick, require least equipment setup but need NDT technician with high interpretation skills for precise results.
An NDT technician carrying the test requires penetrant, developer and cleaner along with lint cloth for penetrant removal and cleaning. This makes the Penetrant Testing very handy and portable for field applications.
Being a highly sensitive NDT method, the test allows the locate and identify small imperfections that might not find with the naked eye.
The sensitivity of the Penetrant Testing is similar to Magnetic Particle Testing if carried out with right procedure & by qualified NDT personnel.
Principle of Dye Penetrant Testing (DPT)/ Liquid Penetrant Testing (LPT)
Dye Penetrant Test method uses certain types of liquids (Liquid with special viscosity & contact angle) which have the property of entering into fine surface discontinuities by capillary action, and remaining there when the excess liquid penetrant is removed.
A suitable developer (White developer in case of Visible Penetrant Testing technique) is then applied.
Against the background of this developer, the retained penetrant stands out by contrast (E.g., red color in Visible Penetrant test technique) and reveals the defect or flaws present on the test surface.
Basics of Dye Penetration Testing
Overview of Dye Penetration Testing
Dye penetration testing, also referred to as liquid penetrate inspection or dye penetrant inspection, is a non-destructive method used for detecting flaws such as cracks, fractures, or leaks in materials.
This type of testing is prevalent in industries where the integrity of materials and structures is of utmost importance. It’s frequently performed on metals, plastics, ceramics, and other non-porous surfaces.
Purpose of Dye Penetration Testing
The main purpose of dye penetration testing is to reveal defects in various materials that might not be visible to the naked eye. These could be surface-breaking defects like porosity, hairline cracks, seams, and leaks. This type of inspection helps in ensuring the safety and reliability of multiple structures and components, contributing significantly to the fields of quality control and safety management.
Other names of Penetrant Testing (PT)
Penetrant testing is used around the globe and has been developed its different names. The most notable terms used for this NDT methods are:
- Penetrant Testing ( or PT), and
- Liquid Penetrant Testing ( or LPT),
- Dye Penetrant (or DPT).
What are the types of Liquid Penetrant Testing (PT) Method?
Liquid Penetrant testing (LPT/DPT) methods can be divided into two major groups:
- Dye Penetrant testing (DPT)
- Fluroscent Penetrant Testing
The major difference between the two types of tests is that DPT utilizes a visible penetrant, usually red color that produces a contrasting indication against the white background of the developer.
The first method involves use of a liquid that fluoresces under black light, which is near ultraviolet light and just beyond the range of the visible spectrum.
Fluorescent penetrants are either basically water-washable or require the application of an emulsifier to render them water-washable.
Visible dye technique uses a penetrant which carries a red dye that contrasts sharply with the background of a white developer.
Visible dye penetrants also are either directly water-washable or can be made so by the addition of an emulsifier.
What are the Suitable Material types of Dye Penetrant Testing (DPT)?
For fluorescent penetrant testing the medium employed is fluorescent liquid i.e. a liquid that glows when illuminated by ultraviolet light (UV) or black light of a wavelength of around 3650 Armstrong. Both these methods are equally effective when applied properly.
In the case of the fluorescent dye, the part is finally examined under black light in a darkened room. The defects glow brilliantly against the darker background.
In the case of the visible dye, the defects show up as bright red markings against the white background of the developer.
Dye penetrant (DP) solvent removable method
The solvent removable DP test is the most widely used & portable technique of penetrant testing methods. This technique requires 3 aerosol cans that are sufficient to perform the test effectively.
They are –
- Solvent cleaner,
- Red penetrant, &
- White developer.
All these types of aerosols are applied to the parts by spraying. The solvent removal is an easy PT method but requires training to perform the test and carry out the evaluation.

DPT is used for testing most materials to detect the surface opening discontinuities such as cracks, porosity, inclusions, lack of fusion & penetration in stainless steel, carbon steel, magnesium, and copper alloys (Brass & bronze), nickel alloys, and many other types.
What are the Advantages of Dye Penetrant Testing (DPT/LPT):
The advantages of Dye Penetrant or Liquid Penetrant Testing over Magnetic Particle Testing or other NDT methods are:
- Penetrant testing is a portable and effective NDT method.
- This test can be used to detect fine surface flaws with high sensitivity.
- The test operation is simple and does not require any external energy source.
- The test can be carried out effectively and rapidly on larger components.
- The NDT technician training requirements are lower compared to other NDT methods.
- The test can be carried out on any non-porous material (metals to non-metals).
What are the Disadvantages of Penetrant Testing (DPT/LPT)?
Disadvantages or Limitations of Dye Penetrant or Liquid Penetrant Testing over Magnetic Particle Testing or other NDT methods are:
- PT can be applied to porous materials.
- The operation time is quite long due to dwelling time.
- Regular monitoring is required to accurately locate the flaw during the development stage.
- The test can only be effective for flaws that are open to the surface.
- The parts must be cleaned fully before the inspection.
- Post cleaning is required.
- The permanent record of results needs to be made using a digital photograph or replica.
- Penetrant Personnel must have adequate training & evaluation skills for the test.
Penetrant testing steps (Liquid Penetrant Testing- LPT Procedure)
Basic Steps:
The penetrant testing (PT) NDT method consists of six basic operation steps independent of the type of penetrant and penetrant removal method as listed below:
- Surface preparation: Preclean and dry the test object.
- Penetrant Application: Apply the penetrant by spraying or brushing or dipping the part to the area of interest.
- Dwell Time: Give sufficient dwell time for the penetrant to wet the surface and sip in the flaw.
- Removal of Excess Penetration: Carefully remove all the excess penetrant from the part surface. Make sure not to disturb penetrant from the discontinuities.
- Application of Developer: Apply the developer to the prepared area. Monitor the area for the development of indicators.
- Surface Inspection: Regular monitoring of the surface for indication formation, interpretation, and evaluation at this stage is required.
- Post Cleaning: Carry out the post-cleaning to remove the residues of the tests.

How to do liquid penetrant testing?
The basic steps that needed to perform Dye Penetrant (DP) or Liquid Penetrant Testing (LPT) are listed below:
Dye penetrant testing procedure
1. Surface Preparation & pre-cleaning:
All parts of the area to be tested shall be free from contamination (such as dust, oil, grease, welding slag, spatters, paint, and chromates etc.) that inhibits flows of the penetrant into cracks or other surface openings.

Solvent cleaning is the most common surface cleaning method in PT. Shot blasting for surface cleaning is not recommended as this peens-over the cracks resulting in their closure. Make sure to dry the part completely after cleaning.
2. Penetrant application
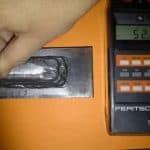
after the part has been cleaned, dried, and cooled to a temperature below 125°F or 52°C, the penetrant is applied by spraying, brushing or dipping the part in the penetrant. Small parts are usually dipped.
On large & complex parts, spaying is the effective technique of penetrant application. For fine flaws such as fissures, it may require more than one time of penetrant application.

3. Dwell Time
Dwell time in the penetrant testing means the time period after the application of the red penetrant to let it sip into the discontinuity.
The typical range of dwell time is 5 to 15 minutes although, for small flaws such as fissures and micro-cracks, it can be up to 30 minutes. Dwell time shall be practiced very strictly to achieve high sensitivity in this test.
4. Removal of excess penetrant
After the required dwell time, the excess penetrant is removed by using a solvent. The most commonly used DPT solvent is acetone or trichloroethylene.
Usually, the solvent is applied by using a clean lint-free cloth and repeating the operation until all traces of excess penetrant are removed. The part is then allowed to dry by normal evaporation before applying the developer.

5. Application of developer
After the excess penetrant is removed, the developer (which consists of fine chalk-like silicates that soak up the liquid penetrant from the discontinuity) is applied in order to make the cracks or other surface openings readily visible by blotting paper action.
The developer draws the penetrant out on each side of the opening increasing the size of the indication.

The length of time before the coated area is visually observed for indication is usually not less than 5 minutes of the manufacturer’s recommendation.
6. Surface Inspection & evaluation
After developer application, the surface is inspected for flaws in visible light for DPT. Follow the approved penetrant testing procedure guidelines for interpretation & evaluation.
The inspector must be able to differentiate between a relevant and false indication at this stage.

7. Post cleaning
Post cleaning is required where the developer or residual may interfere with subsequent operation or service requirements.
It is particularly important where residual PT might combine with other materials in service to produce corrosion products.
Post cleaning shall be carried out immediately after inspection to avoid adhesion of the developer on the surface.
Dye Penetrant Developer Types
Developers are either in the form of dry powder, suspension in water or non-aqueous wet developer.
Dry developer is applied by dusting on the completely dry part. Suspension-type wet developers are applied by brushing or spraying.
When a non-aqueous wet developer is being used, the surface must be perfectly dry as when the dry powder is used.
In the case of the water suspension developer, the surface need not be dry, but the drying becomes necessary after the application of the developer.
After the developer has been applied, sufficient time must be allowed to draw or blot out the penetrant from the discontinuity.
After the completion of inspection, the part or area is cleaned with a suitable solvent. This inspection method is suitable for locating discontinuities which are open to the surface.
It cannot detect subsurface defects. But within its scope it is as effective as magnetic particle inspection.
Procedure for Dye Penetration Testing
Grasping the Fundamentals of Dye Penetration Testing
As an essential component of non-destructive testing, dye penetration testing serves as an operative tool for revealing surface imperfections or cracks on non-porous metallic substances that might remain hidden from the naked eye. It is quite prevalent within sectors such as aerospace, automotive and petroleum, where the preservation of material integrity holds significant importance.
The Initial Stage: Surface Cleaning
The dye penetration testing process begins with an in-depth surface cleaning. This step is vital as it removes any oil, dust, grease, or dirt that could interfere with the effectiveness of the dye. While various cleaning solutions can be used to clean the surface, it’s essential that the cleaning agent used does not result in harmful reactions with the material or the dye.
Application of the Dye
The second step in the process involves applying the dye. The dye, generally a vivid color like red or fluorescent for easy detection, is sprayed or brushed onto the surface. It should adequately envelop the area being tested. After application, the dye is left to dwell on the base material for a specific time period.
Removal of Excess Dye
Post dwell time, any excess surface dye is delicately removed without intruding into any potential surface-breaking indications. This can be done using a dry lint-free cloth. It’s important to avoid using solvents at this stage as they can inadvertently wash the dye out from defects or cracks.
Developer Application
Next, a developer is applied to draw out the dye from any cracks or defects. This action produces a stark contrast against the dye, thereby highlighting any faults present on the surface. It works by absorbing the dye that has permeated into any faults or discrepancies on the surface.
Final Inspection and Interpretation
The final step in the dye penetration testing process is the inspection of the materials. The professionals conducting the test will examine the surface, often under ultraviolet light, to better see any areas where the dye has “bled out” into the developer. The bleeding provides visible proof of defects, cracks, or discrepancies. The results of the test inform subsequent decisions, such as repairs or rejection of the material.
Understanding the Precision in Dye Penetration Testing
Dye penetration testing is a procedure that calls for extreme precision and careful attention to detail at every stage. From initial surface cleaning to final assessments, each step must be meticulously executed by trained specialists. Any minor misstep could possibly lead to inaccurate results, making it crucial to understand and maintain the high level of precision needed throughout the process.
Considerations in Choosing a Dye for Testing
Choosing the Perfect Dye for Penetration Testing
This intricate testing method is typically employed to identify flaws such as surface and subsurface skin cracks, laps, pinholes, and porosities in a variety of materials. It involves the usage of a penetrative dye. This dye seeps into the detected defects, effectively visually highlighting them under suitable lighting conditions. Therefore, the success of this testing procedure heavily depends on the correct choice of dye, as it plays a pivotal role in flaw detection.
Material Type
The material undergoing testing is the first significant factor to consider when selecting the corresponding dye. The nature of the material dictates the choice of the dye. For example, while red dye is typically used for metal parts due to its high visibility, fluorescent dye, ideally observed under ultraviolet light, is selected when testing on less transparent materials, thus enhancing visibility regardless of the material’s inherent characteristics.
Dye Characteristics
Another crucial factor when selecting a dye involves the dye’s intrinsic properties. The dye’s ability to penetrate the material, also known as its wetting ability, plays a vital role in detecting surface flaws. The viscosity of the dye also matters – a dye with low viscosity is generally used as it can seep into the tiniest of cracks, boosting the efficiency of the test. In addition, the dye should have good washability which ensures it can be removed after the test, preventing staining or discoloration of the material.
Test Conditions
The conditions under which the test is conducted also influence the choice of dye. For example, if the test is performed outdoors and exposed to various weather conditions, a waterproof dye could be more beneficial. Lighting conditions are crucial too; as mentioned, fluorescent dyes work best under ultraviolet light. Time is another important consideration, as some dyes require a dwell time to ensure effective penetration.
Importance of Accurate Dye Selection
The right dye selection can make a significant difference in the accuracy of the results obtained from the dye penetration testing. It can correctly identify defects that would have been otherwise overlooked, thereby ensuring the reliability and safe usage of the material under inspection. Failure to select the appropriate dye can result in inconclusive or inaccurate results, leading to potential risk when the material is in use.
The process of selecting the correct dye for a dye penetration test is not a simple or arbitrary decision, but rather a thoughtful process that includes consideration of various factors. With the right dye, the dye penetration test can yield accurate and trustworthy results.
Benefits and Limitations of Dye Penetration Testing
Why Dye Penetration Testing is Beneficial
One of the standout advantages of Dye Penetrant Inspection (DPI), also known as dye penetration testing, is its non-destructive and straightforward methodology. The process involves applying a colored or fluorescent dye onto the material being tested. This dye then seeps into any surface-breaking defects. As a developer is added to the material, it draws out the dye from these defects, allowing for clear visibility of any potential issues.
Not only is DPI user-friendly due to its minimally invasive nature, but it is also cost-efficient. In comparison to other non-destructive testing (NDT) methods, DPI does not require a large investment and is conveniently portable. This makes DPI a preferred choice in various fields and diverse working environments. It is often applied to inspect large quantities of components or parts, and is notably useful for routine maintenance inspection of big structures or equipment.
The Limitations of Dye Penetration Testing
Despite its various advantages, dye penetration testing does have limitations. One significant drawback is that DPI can only detect defects that are open to the surface of the test material, such as cracks or welds. This means that underlying deficiencies, subsurface flaws, or defects that are not directly accessible from the surface can go undetected using this technique.
Moreover, this technique is not suitable for materials with extremely rough surfaces or porous materials, since these conditions can lead to false positives due to dye residuals. In addition, the cleanliness of the test material can significantly affect the test outcomes.
Additionally, DPI can only provide qualitative information about the presence of defects, but cannot quantify the depth or the severity of the flaw. Other techniques may be necessary to gain a complete understanding of the material’s integrity.
Understanding and Navigating Limitations of Dye Penetration Testing
Dye penetrant testing, though powerful, may not always be the right tool due to its inherent limitations. Certain surfaces, like those that are rough or porous, may lend themselves better to alternative inspection methods. In such circumstances, options like magnetic particle inspection could provide better results, with their capacity to detect both surface and minor subsurface discontinuities. Also, if one suspects defects buried deep within the material, methods like ultrasonic testing or radiography, which penetrate far into the material, are more suited.
In situations where quantitative data about the flaw’s depth or severity is required, eddy-current testing, for example, can be employed. Therefore, while dye penetrant testing is indeed a cost-effective and easily applicable NDT method, it’s critical to keep its constraints in mind and resort to alternate methods when necessary.
Examples and Case Studies of Dye Penetration Testing
Dye Penetration Testing: A Proven Technique for Surface Defect Identification
Despite its limitations, dye penetration testing, also known as dye penetrant inspection (DP), is relied upon by various industries for identifying surface-bound defects in different materials. This non-destructive testing method holds particular importance in fields like aircraft maintenance and automotive manufacturing.
Notably, the method played a pivotal role in safeguarding the integrity of the Delta IV Heavy rocket. This famed vehicle, which launched surveillance satellites for the United States National Reconnaissance Office, relied on dye penetration testing for scrutinizing its outer surface for any potential fissures or cracks.
Even the smallest flaw could result in devastating outcomes during takeoff. As such, dye penetration testing was instrumental in ensuring the secure deployment of vital spy satellites.
Using Dye Penetration Testing in the Medical Field
In the medical device industry, dye penetration testing is essential for ensuring the reliability of medical equipment. An illustrative case involves the manufacture of prosthetic hip joints. These implants must bear several years of intense mechanical stress while exposed to harsh physiological conditions.
To ensure the product is void of micro-cracks before implantation, manufacturers use dye penetration testing, which can detect defects as small as 0.02 millimeters. This level of precision not only assures the longevity of the implant but also protects the patient from adverse medical events.
Real-world Application for Bridge Infrastructure
An instance where dye penetration testing made a difference was during the crucial inspections of bridge infrastructure. The Colorado Department of Transportation routinely utilized dye penetration testing to identify hairline fractures in the state’s aging bridges.
If left undetected, these fractures pose significant threats to the structural integrity of these bridges, risking catastrophic fails with potential damage, injury, or loss of life. In 2013, the CDOT made plans to inspect every bridge across Colorado using this testing technique, demonstrating its practical utility.
Assuring Elevator Safety with Dye Penetration Testing
Some high-rise buildings and commercial complexes extensively rely on dye penetration tests to maintain the safety and functionality of their pneumatic vacuum elevators. These unique transportation devices are susceptible to metal fatigue due to constant cyclical loading.
Regular DP testing checks for potential fatigue cracks or other surface flaws that may affect the elevator’s efficiency and safety. This routine inspection equips engineers to trace even invisible defects, ensuring necessary timely repairs.
The Role of Dye Penetration Testing in Aerospace
In the aerospace sector, dye penetration testing takes credit for safely grounding a fleet of F-15 fighter aircraft in 2008. At the time, an F-15 aircraft crash incident occurred due to a defective structural support part.
To avoid repeating a similar mishap, an extensive dye penetration test was performed across the entire fleet of these aircraft. The findings highlighted similar defects in some of the aircraft, which necessitated immediate grounding for repairs. The prompt procedure possibly thwarted further accidents, emphasizing the importance of DP testing in maintaining aerospace safety standards.
These real-world cases underline the significance of dye penetration testing in various fields, emphasizing its indispensability in maintaining safety, preventing catastrophic failures, and safeguarding users’ lives, from everyday devices to complex industrial machinery.
Delving into the fascinating world of dye penetration testing uncovers its remarkable potential in spotting concealed flaws in various items. Having understood its intricacies, procedure, factors affecting dye choice, and advantages and restrictions, it becomes evident how invaluable this technique is.
Furthermore, the provided real-world instances and case studies have showcased the practical usage and efficiency of this method. However, while dye penetration testing is an excellent tool in its own right, it is vital to remember that using a combination of different tests may be necessary to overcome the limitations of this standalone method and to ensure the most reliable and detailed analysis possible.
Liquid penetrant testing applications
Liquid Penetrant Testing or Dye Penetrant Testing is used for performing the surface inspection for welded parts, machined parts, casting and forging.
The main applications of Liquid Penetrant Testing or DPT are:
- Surface NDT inspection of weldments in plates, pipes.
- Penetrant testing to find defects in machined parts.
- Surface inspection for highly critical aerospace components.
- Inspection of welding repairs to ensure complete defects removal.
- Surface inspection of in-service materials to verify presence of material defects.
- Inspection of components to check their integrity.
Material Welding is run by highly experienced welding engineers, welding trainers & ASNT NDT Level III bloggers.
We strive to provide most accurate and practical knowledge in welding, metallurgy, NDT and Engineering domains.

could u please explain the uses developer in PT tests.some notes divided developer in two classification one is non flourescent type dev. and the is
flourescent .
what is the application and uses in two types.