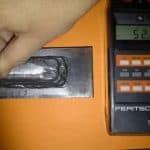
What is UT Gauging?
UT (Ultrasonic Testing) gauging is an NDT Technique used for measuring the thickness of material (plate, pipe, forging or casting or any other material shape) using the contact pulse-echo technique at temperatures not to exceed 93◦C [200◦F] where only one-sided access is available for the inspector.
UT gauging technique is used a lot in oil & gas sector where corrosion mapping of piping’s, vessels and other equipment is part of inspection plan on regular intervals.

Ultrasonic (UT) thickness gauging can be carried out of metals, rubber, glass, plastic, ceramic, fiberglass or composite materials.
How does ultrasonic thickness gauge work?
Ultrasonic thickness gauging applies the principle of the UT contact pulse-echo technique.
A sound beam is sent to the material to be tested and this sound beam is reflected back from the other side of the material.

The time taken by the sound to travel is calculated by the gauging machine and converted to the distance (in millimeters or inches).
Conventional Ultrasonic Testing machines can also be used for UT gauging with a 90-degree probe instead of using UT gauging equipment as shown in the above figure.

What is the minimum thickness limit for manual UT?
UT gauging can be carried out for thickness range of 0.003 inches (0.08 mm) to 25 inches (635 mm), however it depends on the type of material and probe selection.
Generally, by considering standard probes a minimum nominal thickness of 6mm and pipe diameters of above 2” NB is recommended to be inspected using UT gauging or ultrasonic testing.
Before starting the work, calibration of UT gauging equipment is mandatory to ensure the inspection or check of the actual material thickness used on the job.
Any wrong data can lead to component failure in-service which could have a lethal substance or liquid or vapors.
How accurate is ultrasonic thickness measurement?
The accuracy of thickness measurement on clean surface materials can achieve high accuracies but this is not the case for in-service materials/fixed equipment etc. like live pipelines, vessels, columns, and heat exchangers in oil and gas industries.
A list of the affected factors can be considered to achieve the highest accuracy is:
- Test surface condition
- Reflecting surface condition
- Flaw reflecting face morphology
- The temperature of the component
- The velocity of the component
- Coupling medium to suit the test surface conditions.
In addition to the above, the accuracy of the thickness will depend on accurate calibration, probe type and size, and resolution capability of the flaw detector(equipment).
Can we do UT gauging below 6mm?
Yes, under certain situations UT for material thickness less than 6 mm can be performed.
In such scenarios, UT probe choice is very important and should evaluate to decide its thickness measurement abilities, delay line and surface resolution of the probes also play significant roles as per job requirements.
Advantages of Ultrasonic Thickness Gauging
- Reliable and accurate,
- Easy to use,
- Only one side access is required,
- Non-destructive testing method,
- Broader thickness measurement range,
- Instant result,
- Equipment’s can log the data for further analysis.
UT gauging procedure
Following are the simple steps in UT gauging procedure based on the component thickness, diameter, surface condition, etc.
- Select the right probe, cable, equipment, and standard calibration block.
- Do all the connections and switch on the equipment.
- Set the initial echo to zero.
- Select the right technique like single echo, single echo delay line or multiple echoes.
- Do the range calibration on the standard calibration block.
- Check resolution, sensitivity, horizontal linearity, and vertical linearity.
- Select appropriate couplant as per surface conditions.
- Apply couplant on the test locations and start scanning the surface and record the readings.
- Prepare the report.
Ultrasonic Velocities in common Materials
The velocity of ultrasonic sound waves in commonly used material are:
- Aluminum: 0.2490 in./μsec (6320 m/sec)
- Brass: 0.1740 in./μsec (4430 m/sec)
- Copper: 0.1830 in./μsec (4660 m/sec)
- Fiberglass: 0.1080 in./μsec (2740 m/sec)
- Inconel: 0.2290 in./μsec (5820 m/sec)
- Cast Iron: 0.2200 in./μsec (5600 m/sec)
- Nylon: 0.1020 in./μsec (2600 m/sec)
- austenitic stainless steel: 0.2260 in./μsec (5740 m/sec)
- Titanium: 0.2400 in./μsec (6100 m/sec)
- 4340 steels: 0.2300 in./μsec (5850 m/sec)
- Polyethylene, high density (HDPE): 0.0970 in./μsec (2460 m/sec)
- Silicone: 0.0580 in./μsec (1485 m/sec)
UT Gauging report
UT gauging report should include the location map for gauging.
For piping, it shall have the piping sketch, gauging locations and direction as North, south, east & west. Additional direction can also be given.
Types of UT gauging Transducers
The main types of Ultrasonic testing thickness gauging transducers (probes) are:
- Contact probe,
- Immersion probe,
- Delay line probe,
- Dual element probe.

UT Gauging standards
- ASTM E797 and
- EN 14127
Material Welding is run by highly experienced welding engineers, welding trainers & ASNT NDT Level III bloggers.
We strive to provide most accurate and practical knowledge in welding, metallurgy, NDT and Engineering domains.


